Getting started with Portfelio
Portfelio is an app for photographers to run their business. You manage clients and projects from the first inquiry to the paid invoice. You deliver photos in client galleries. You cull and edit shoots in Studio on the Mac. Lio, the built-in assistant, does tasks for you when you write to it.
Your account starts with sample projects and a sample gallery, so you can test every feature before you use it with a real client.
Setup checklist
Do these five things before you work with a real client:
Fill in your business details in Settings → Business (section 2).
Connect your email in Settings → Integrations (section 2).
Publish your bio page and put its link in your Instagram profile (section 3).
Open a sample project and its Client page, to see what your clients will get (section 5).
Open the sample gallery and its Share panel, to see how delivery works (section 6).
1. Download the apps
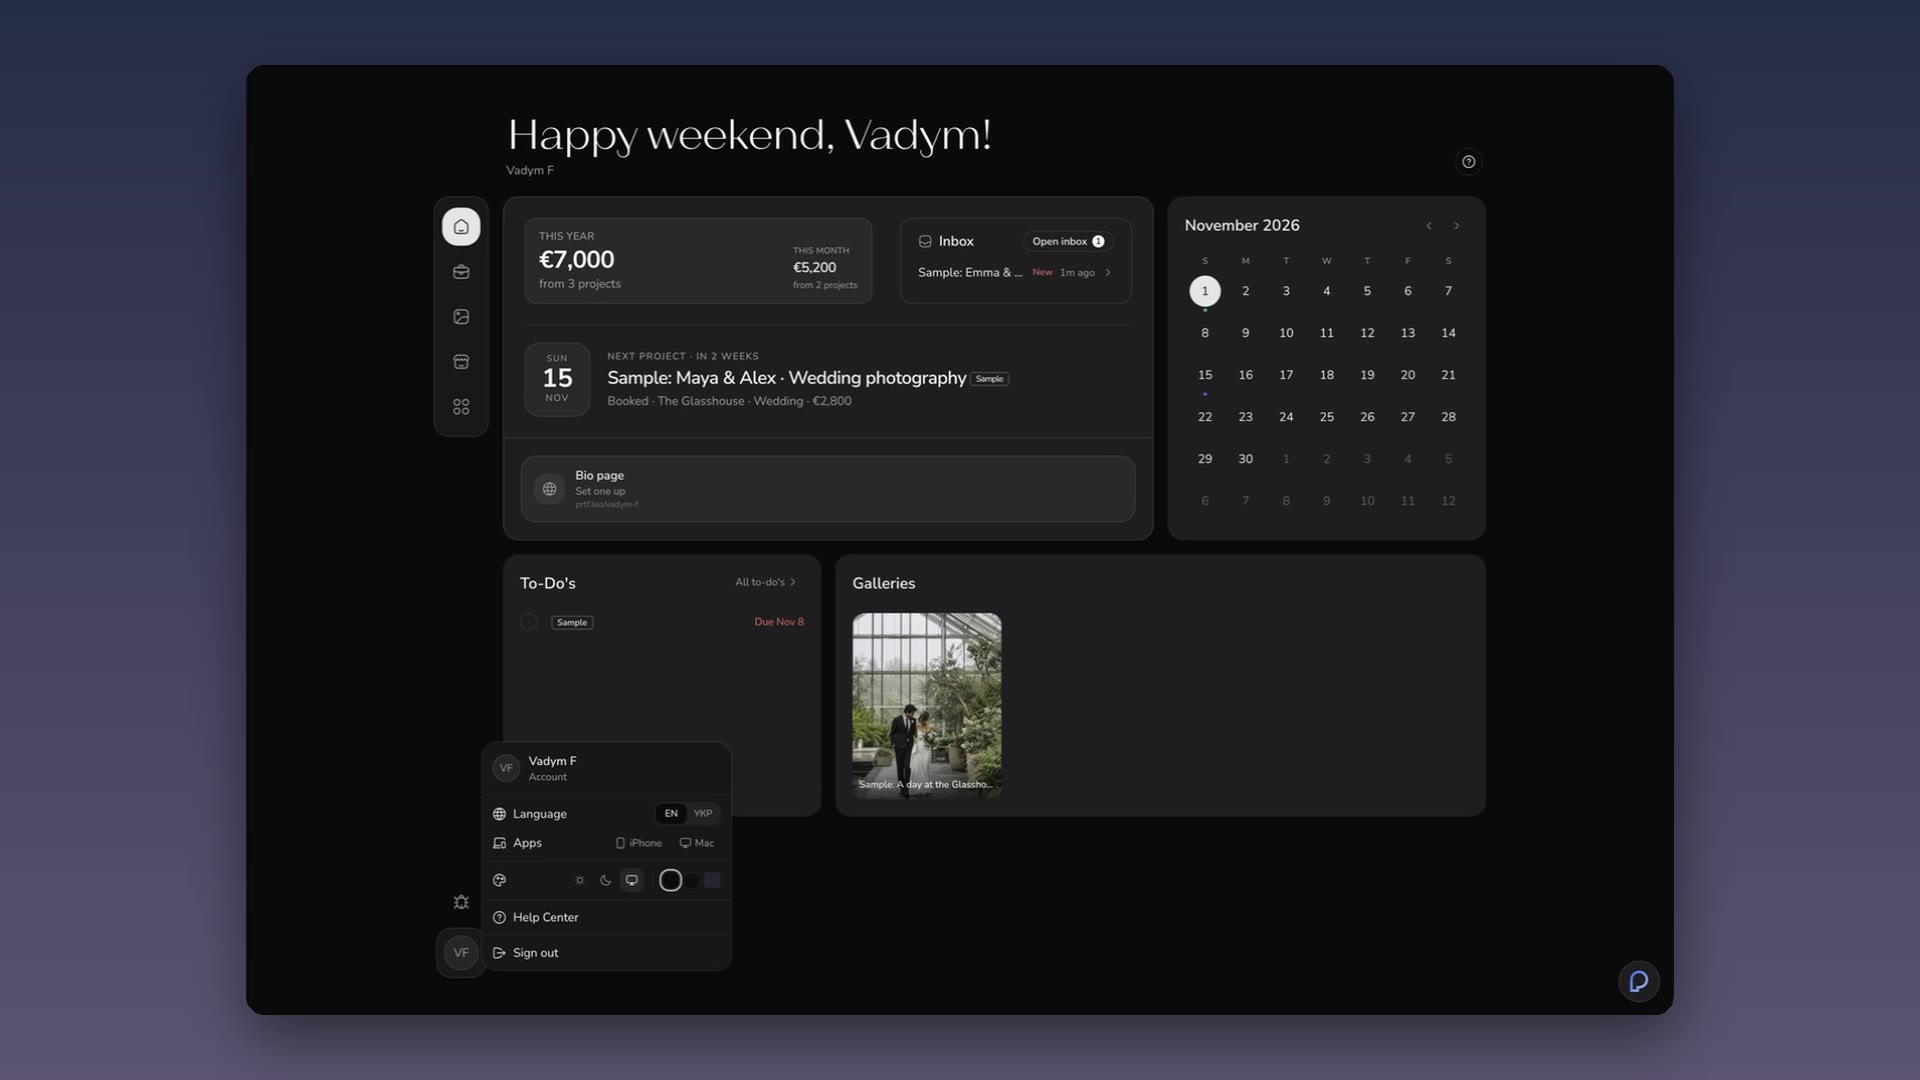
Portfelio has three apps. They share all your data, so you can start on one and continue on another.
- Web app: app.portfelio.me. Everything is here.
- iPhone app: to reply to clients and check projects from your phone. Installed through TestFlight for now.
- Mac app: everything in the web app, plus Studio for your photos. Needs a Mac with an Apple chip (M1 or newer). It updates itself.
In the web app, click your initials at the bottom left. The account menu opens.
Next to Apps, click iPhone or Mac.
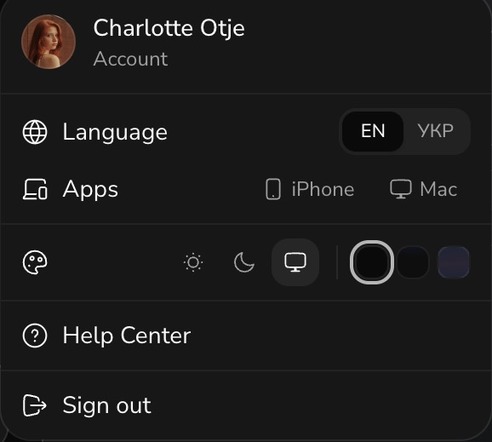
The same links are at portfelio.me/get-started.
2. Set up your business
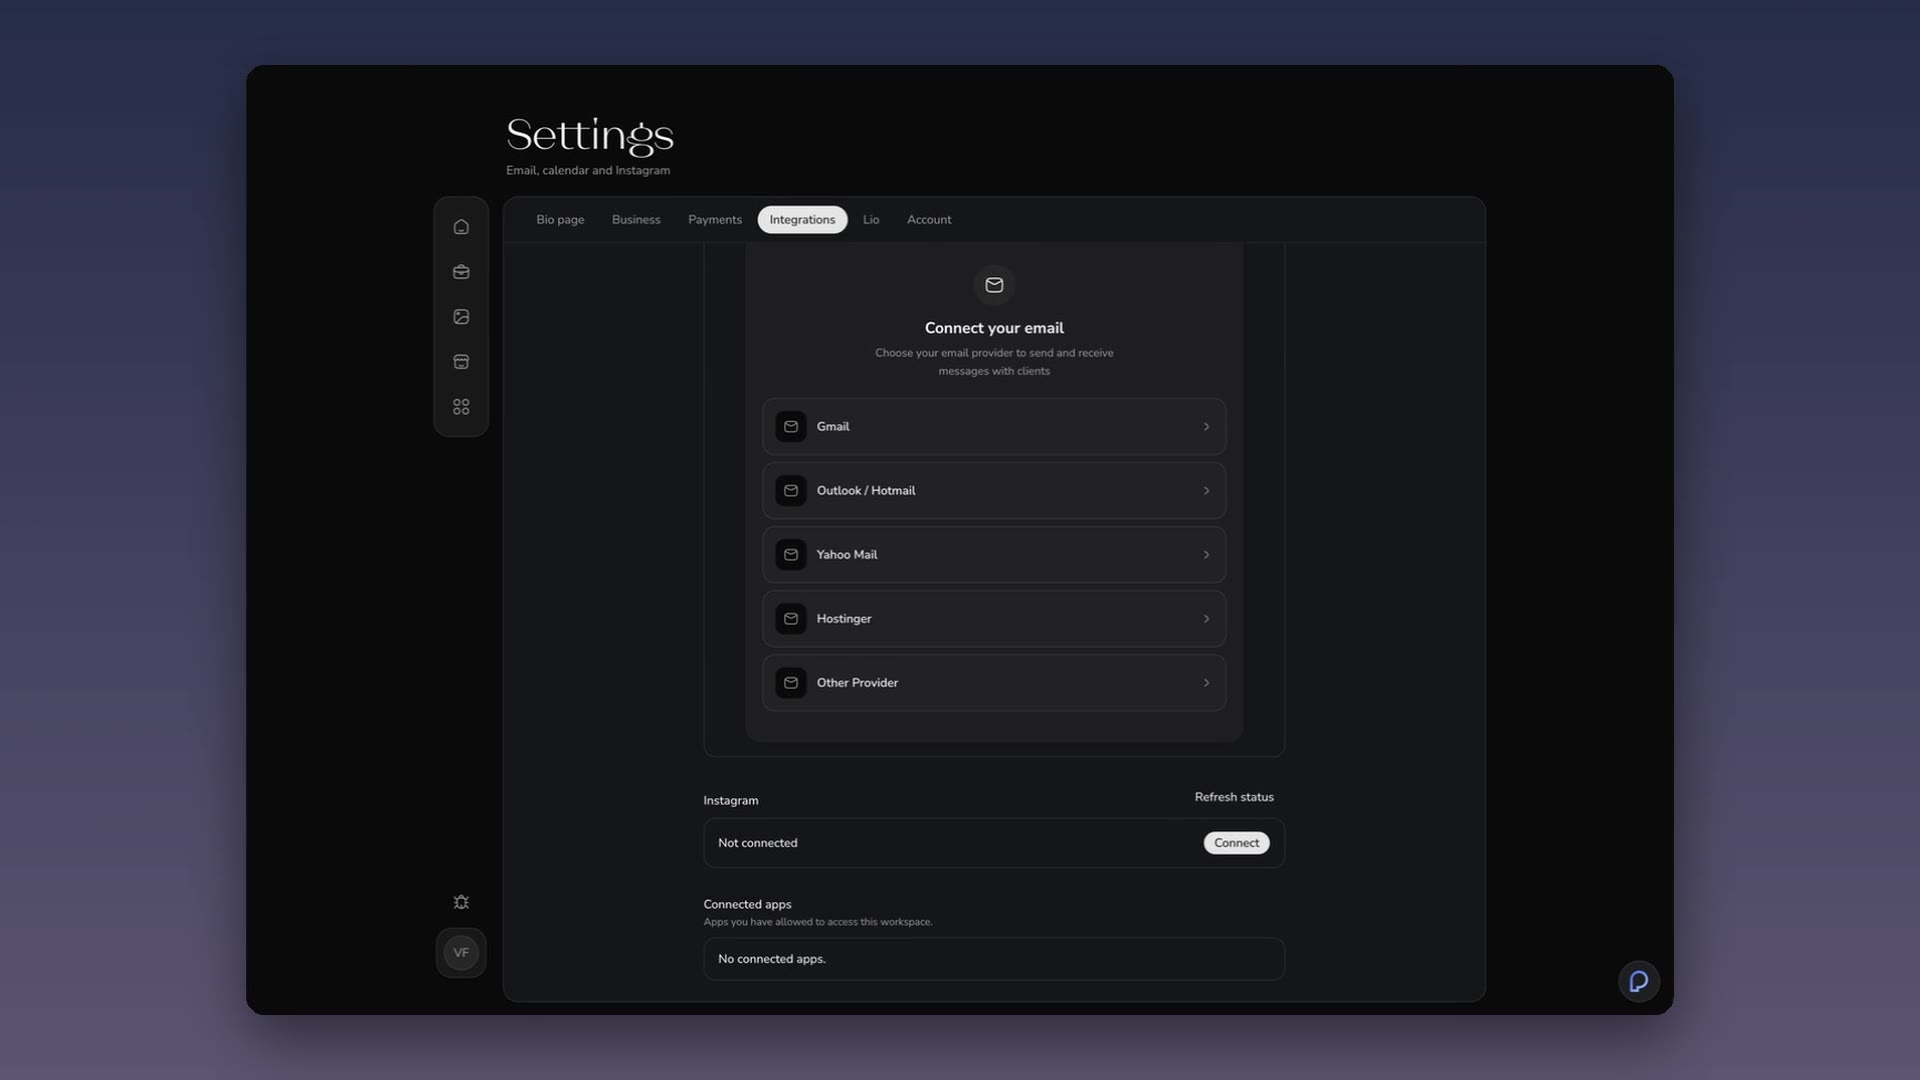
Do this before you send anything to a client. Your contracts, invoices, emails and Client page all take these details from here, so you fill them in once.
Open Settings. It is a tile under Tools, on the web and on iPhone.
Open the Business tab (see the tabs below). Add your business name, email, address and currency, and upload your logo.
Open the Integrations tab. Connect your email. Any mailbox works: Gmail, Outlook, Yahoo, Hostinger and others.

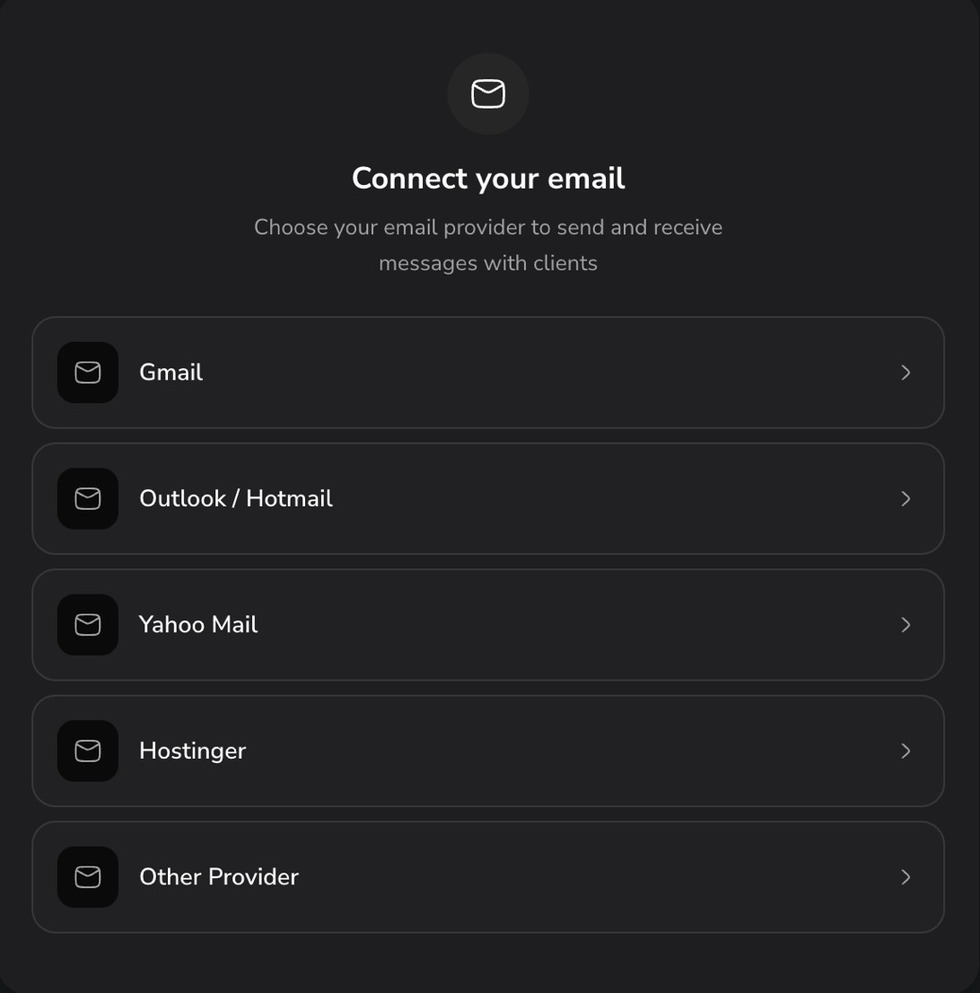
After this, client emails arrive in your Inbox and you can reply from Portfelio.
You can also:
- Add tax details: your tax ID and VAT, in Business. They appear on invoices.
- Connect Instagram: Direct messages arrive in the same Inbox as emails.
- Connect Google Calendar: your shoots appear in your calendar.
- Connect Stripe or PayPal in the Payments tab: clients can pay invoices online.
3. Bio page
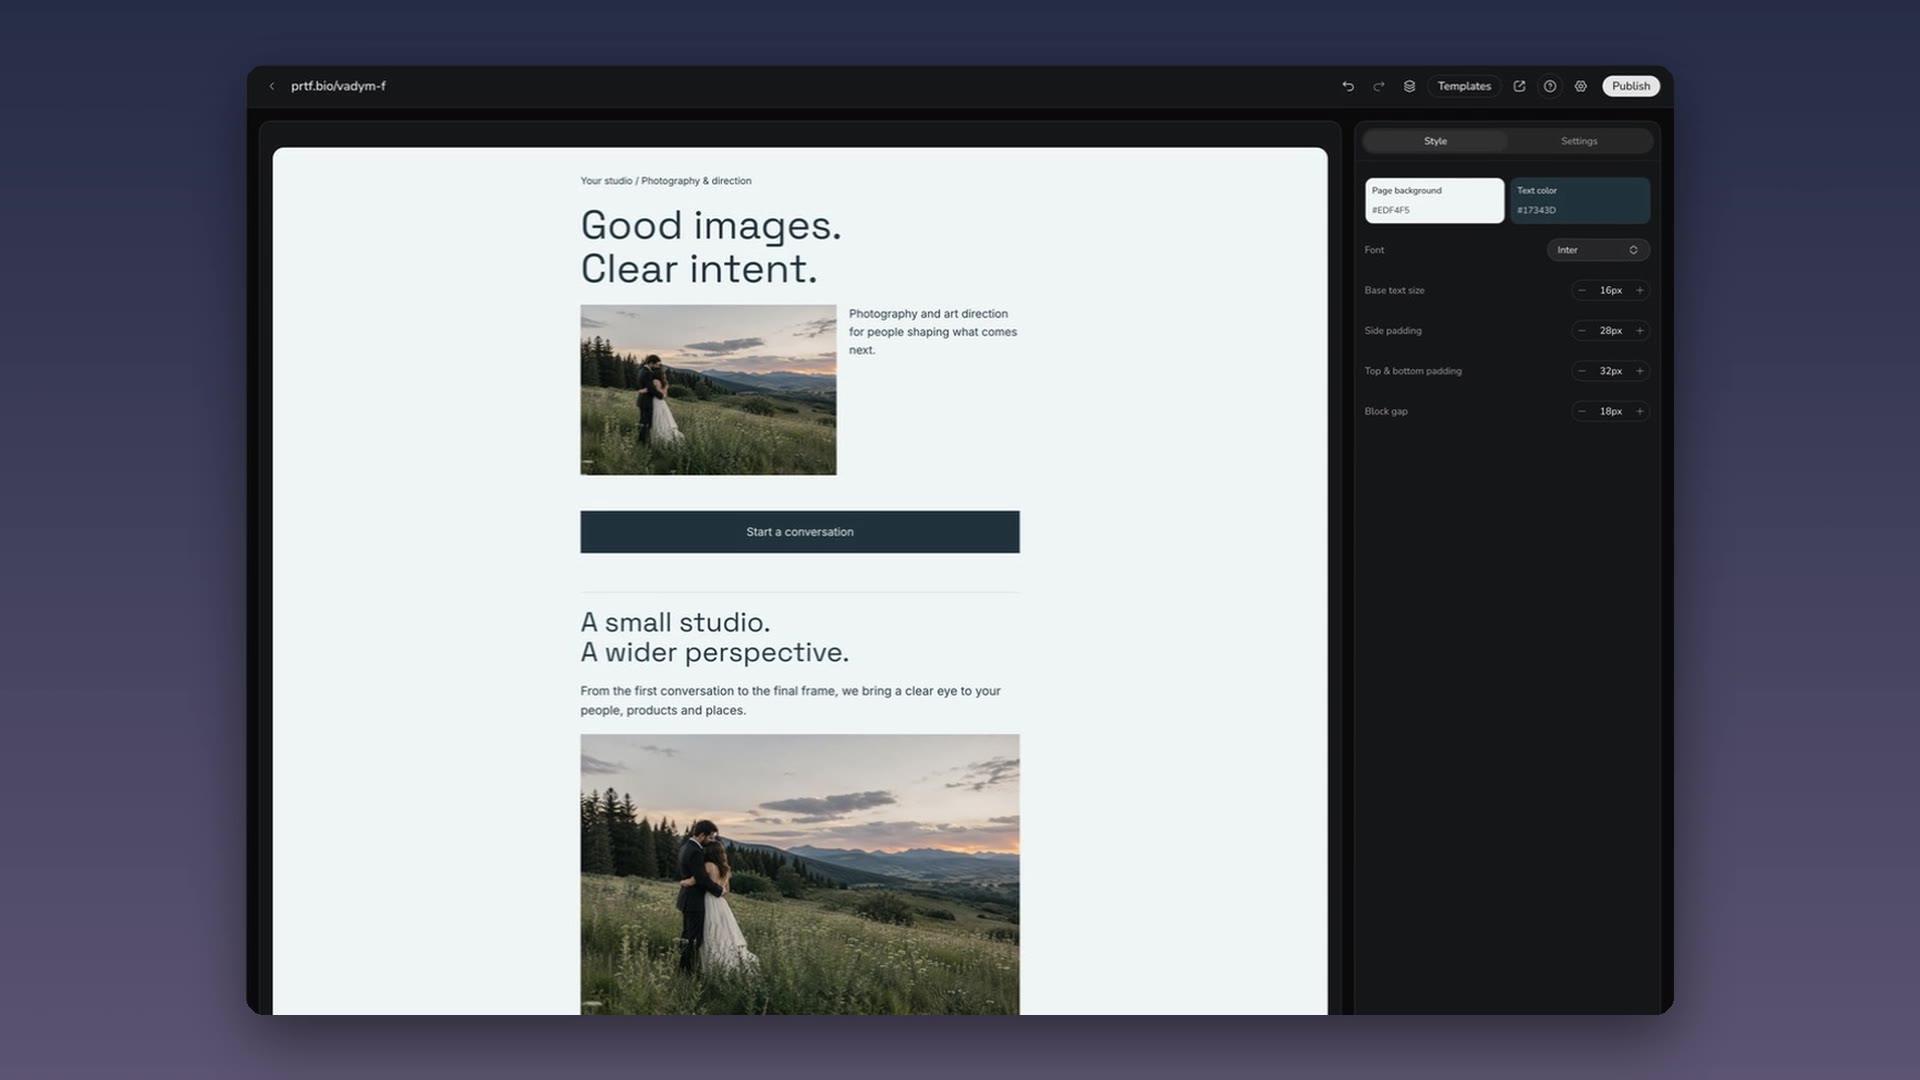
Your bio page is a one-page site with your work, your links and an inquiry form. It works like a booking page: visitors see who you are and send you an inquiry. Its short address is prtf.bio/your-name.
Choose your link, for example prtf.bio/anna-photo.
Click Templates at the top and pick one. Each one already has an inquiry form or button.
Replace the example words and photos with your own.
Click Publish at the top right. Your page is now public.
Copy the link into your Instagram profile and your email signature.

When someone fills in the form, the inquiry arrives in your Inbox (section 4).
Tip: send the link to yourself and fill in the form once, to see what your clients see.
The Bio page editor guide shows every part of the editor.
4. Inbox
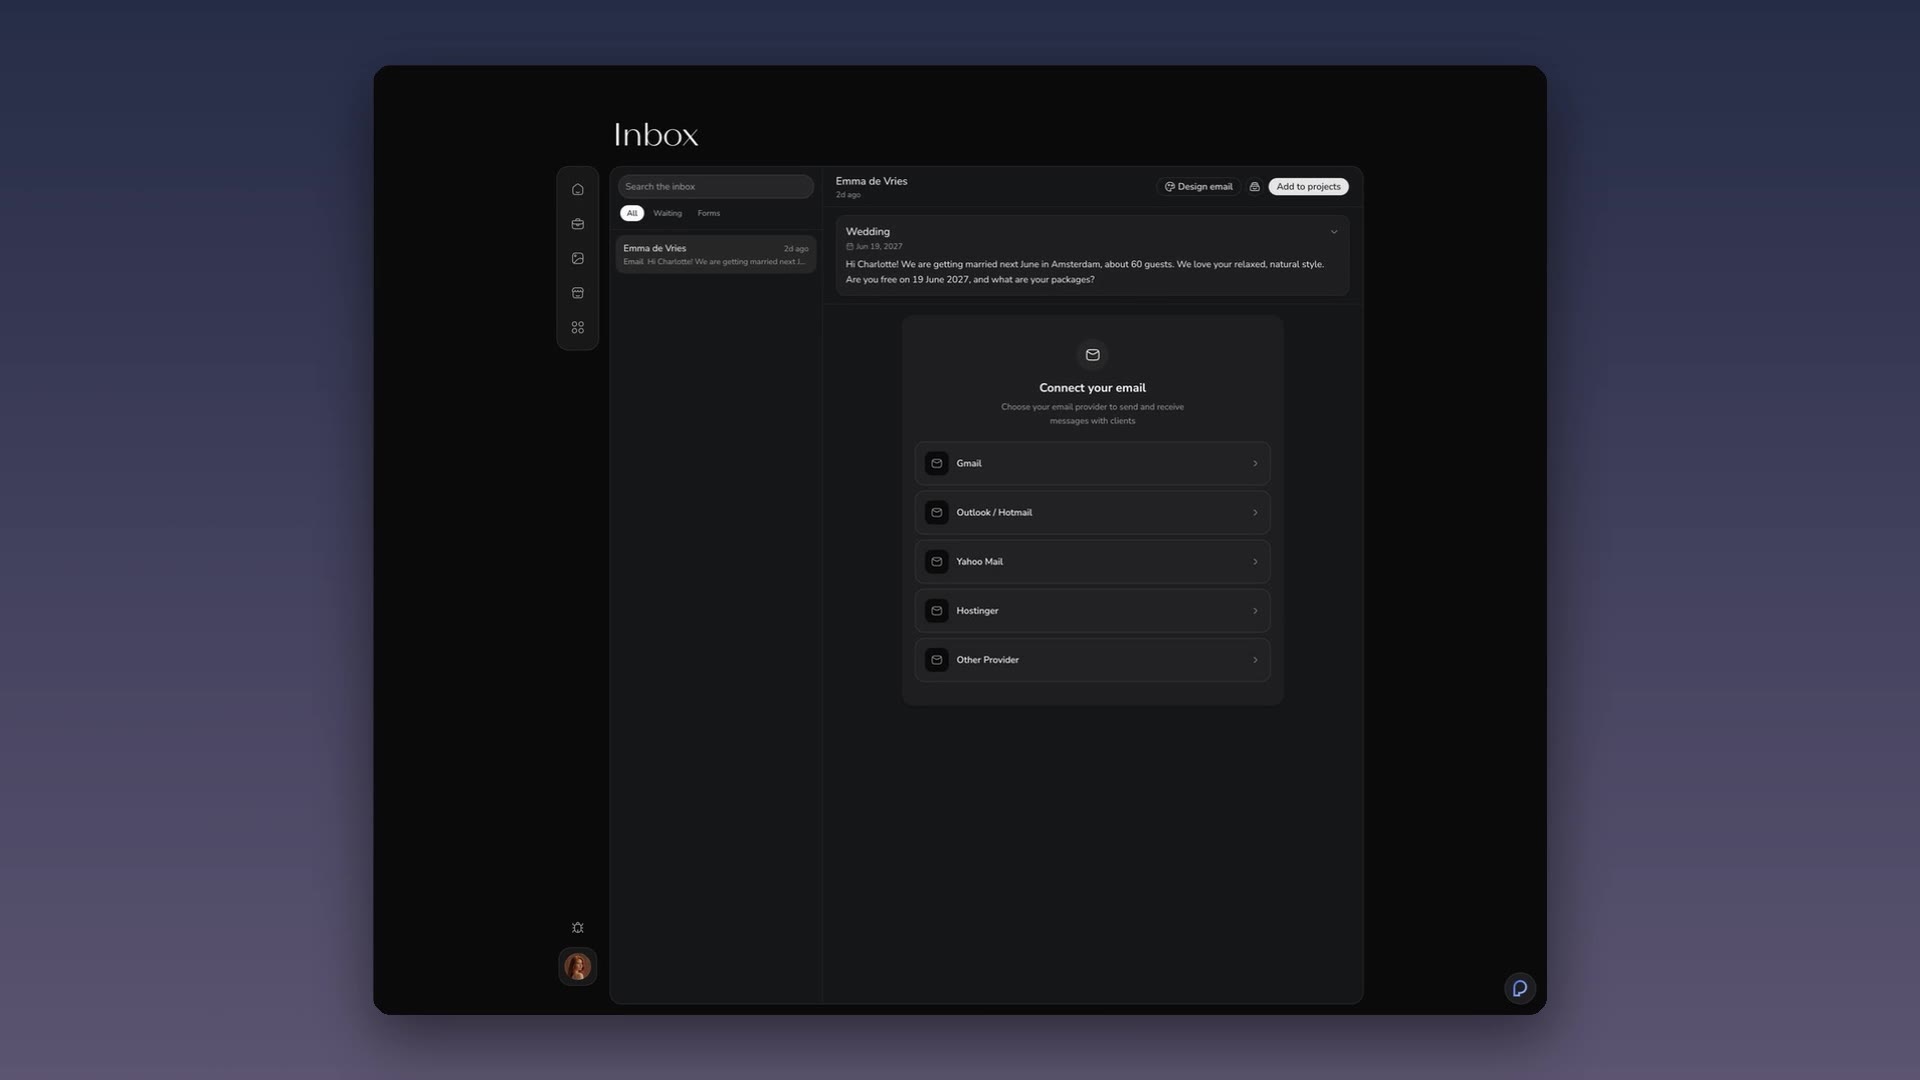
The Inbox is on the Dashboard. It collects every new inquiry in one list: bio page forms, Instagram messages and emails from your connected mailbox.

Open an inquiry. You see the date they asked about and their message.
Reply. Agree on the date, the package and the price. All messages with this client are saved in this conversation.
Click Add to projects at the top right when the client says yes. The inquiry becomes a project (section 5).
You can also:
- Click Design email to send a designed email instead of a plain message, for example with your prices.
- Use the filters above the list: All, Waiting (still waiting for your answer) and Forms (from your bio page).
Tip: check Waiting once a day so no inquiry goes unanswered.
5. Projects and the Client page
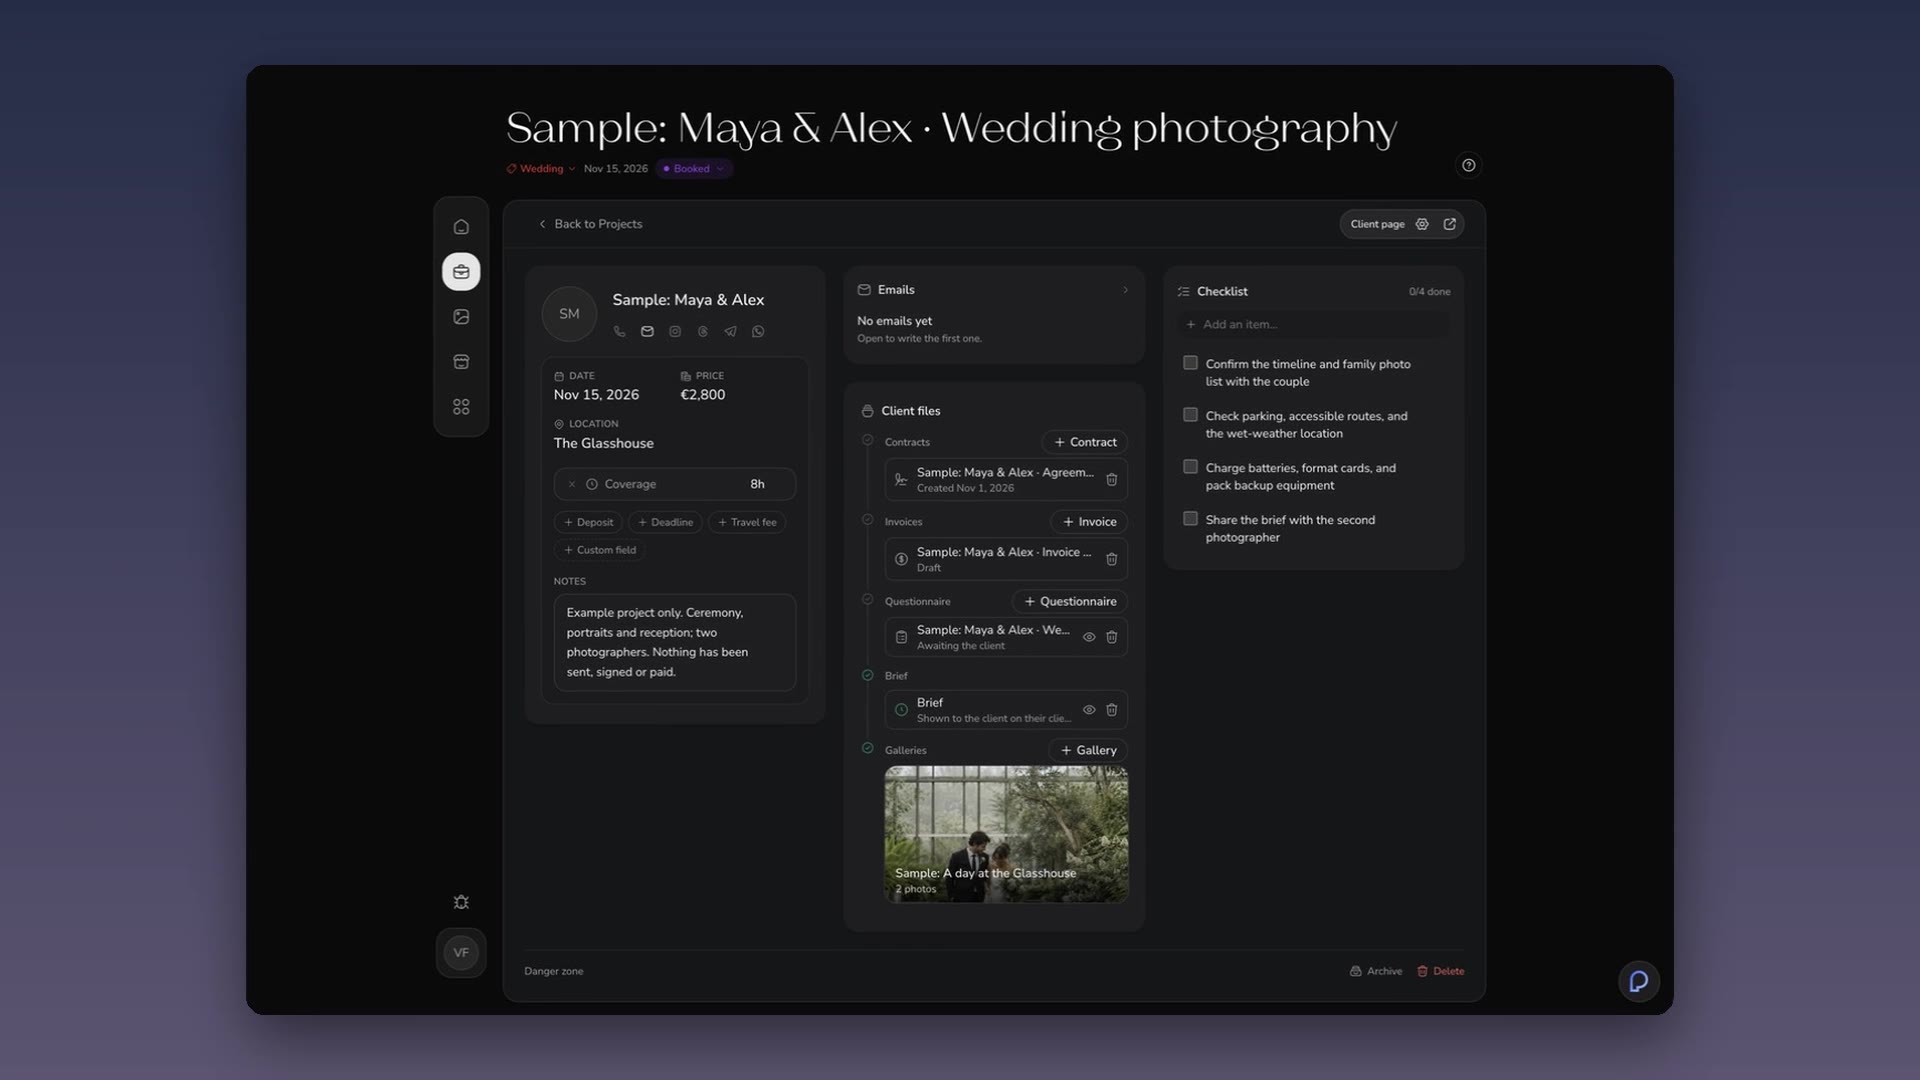
A project holds everything about one client job. The Projects list shows all your jobs by date, with status, type, price and place.
A typical booking goes like this:
Check the details: client, shoot date, location, price and deposit.
Click + Contract and choose one of your contract templates. The client signs it online.
Click + Invoice for the deposit or the full amount.
Click + Questionnaire to ask what you need to know before the shoot.
Click + Brief and write the plan of the day, with the schedule and shot list.
Send the Client page link to your client (see below).
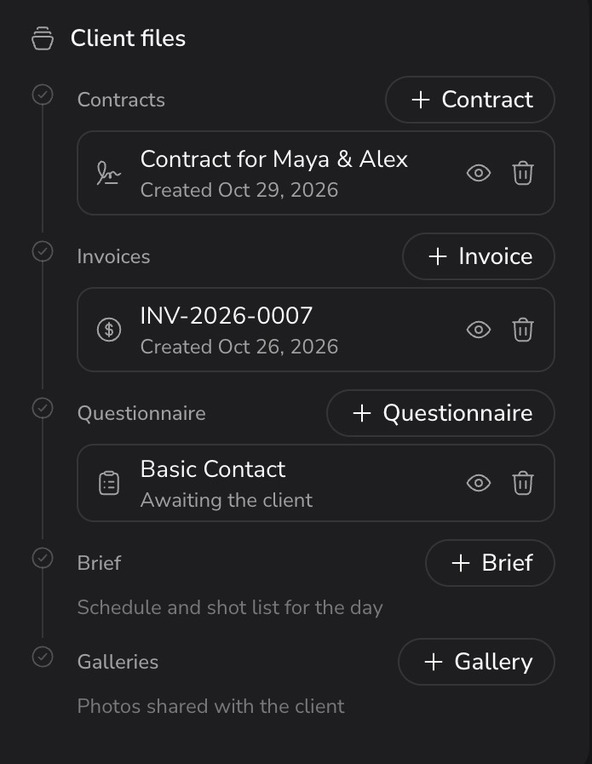
Each project also has:
- Emails: your conversation with this client, from your connected mailbox.
- Checklist: your prep list for the job, including travel and gear. Lio can write it for you.
- Galleries: the photos for this client (section 6).
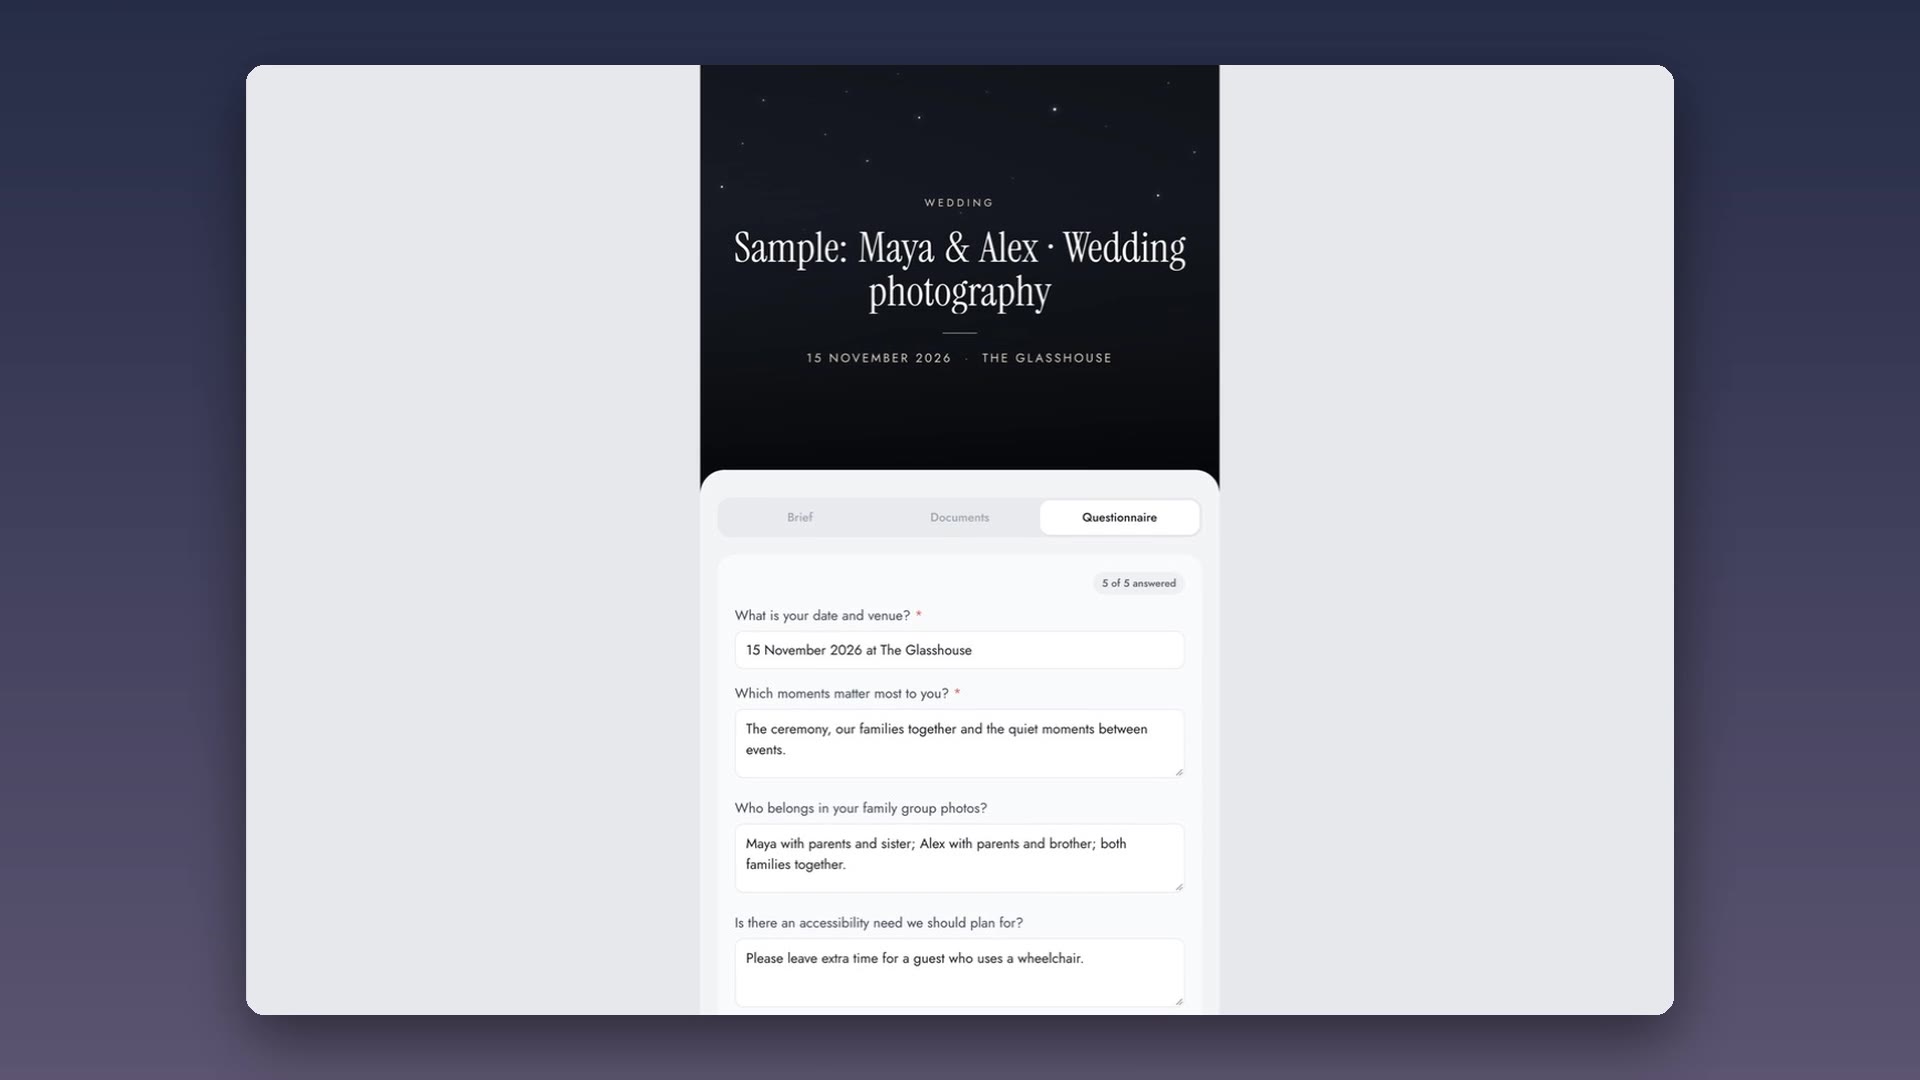
Client page
Each project has one private link for your client, the Client page. Find it at the top right of the project.

On it, your client can:
- read the brief and the timings of the day,
- sign contracts,
- pay invoices,
- fill in the questionnaire.
You choose what it shows. When you change something in the project, the client sees the new version at the same link, so you don’t need to send new files.
Tip: open the Client page of a sample project to see exactly what your client gets.
6. Client galleries
A client gallery is where you deliver the final photos and videos. It can belong to a client’s project or stand on its own, for example for a portfolio set.
Create a gallery from the project, or from Galleries.
Upload your photos and videos. Add sections, for example Ceremony and Party.
Open Design and choose the cover photo and layout.
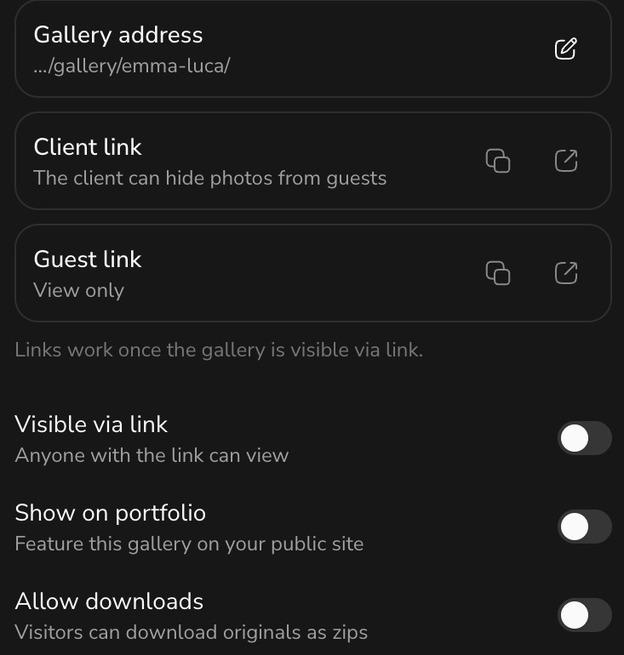
Open Share and turn on Visible via link. The links only work after this.
Turn on Allow downloads if the client may save the photos.
Copy the Client link and send it to your client.
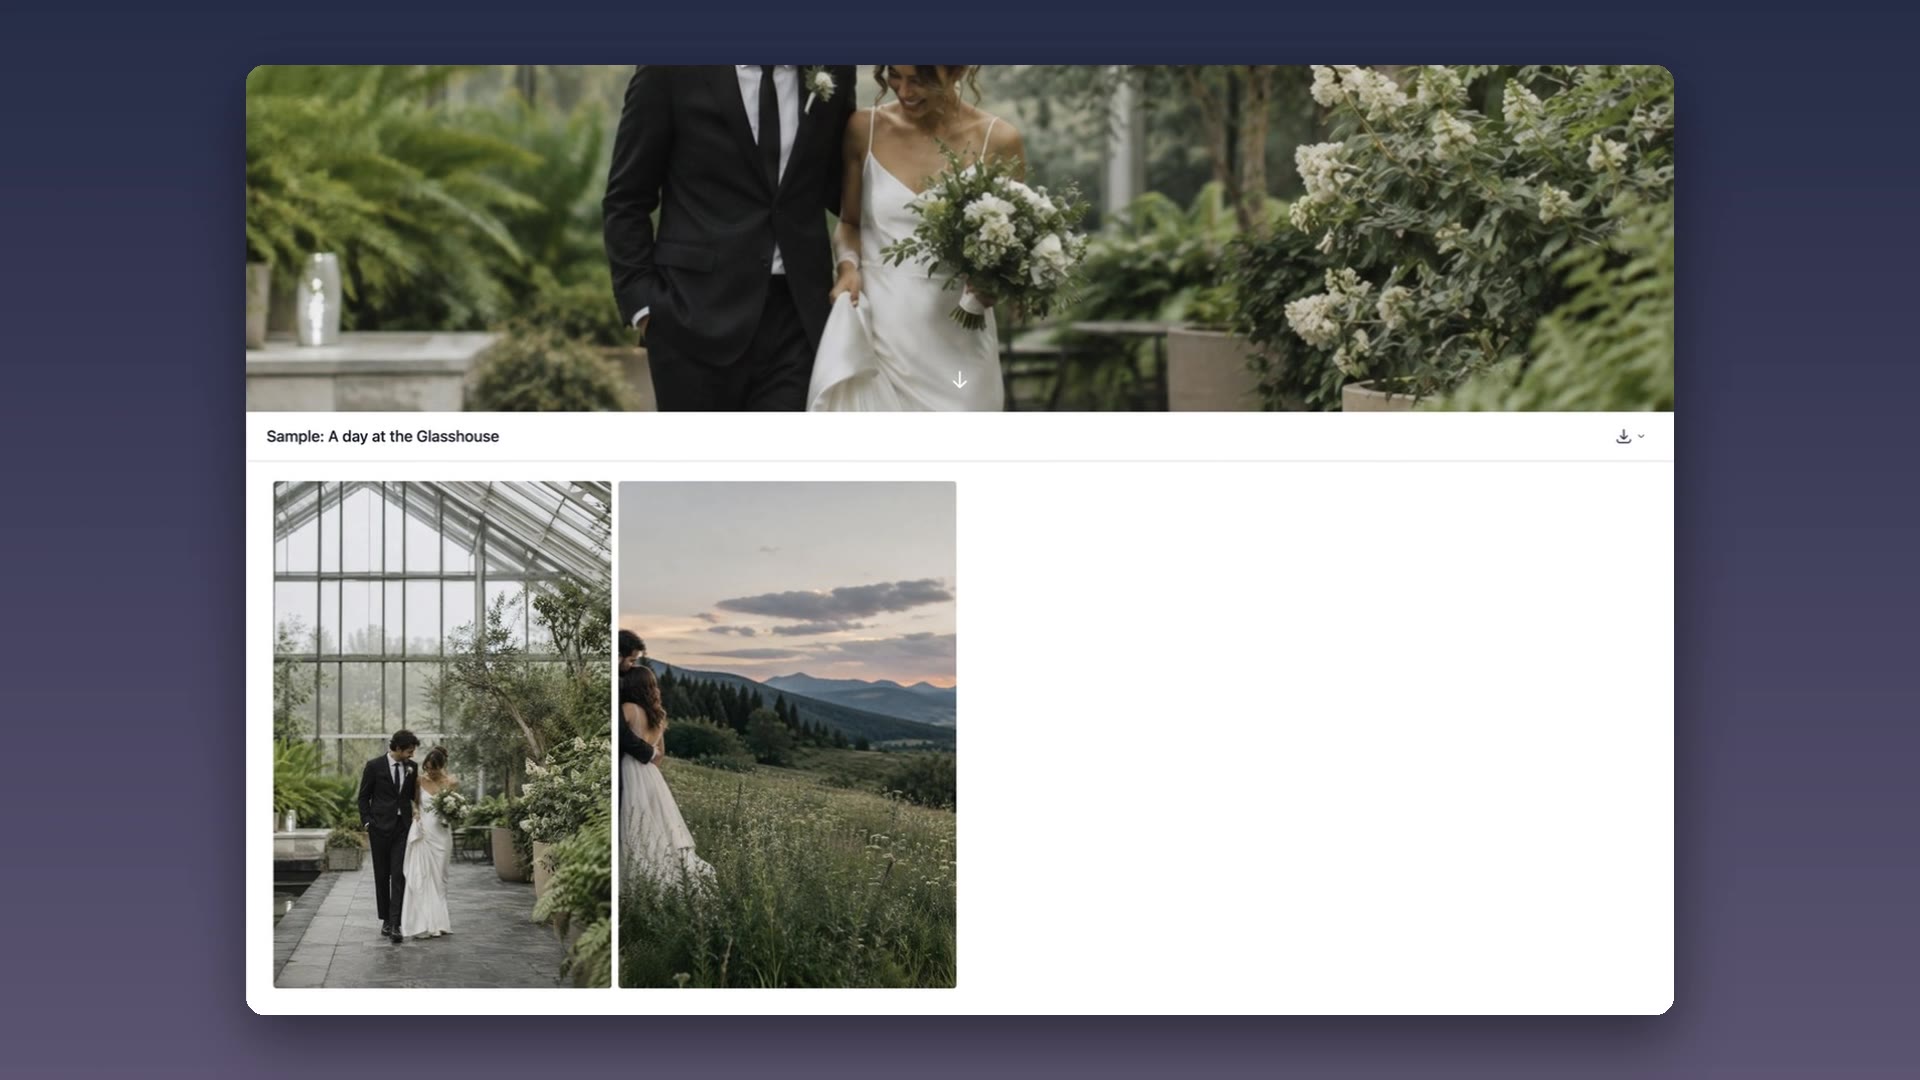
Your client sees a full-screen cover, then the photos. Each photo opens full screen.
You can also:
- Share a guest link: a second, view-only link for family and friends. The client can hide photos from guests.
- See favorites: the photos your client marked as favorites.
- Choose download size: full size or web size, as a ZIP file.
- Send a helper an upload link: they add photos without an account.
Good to know: videos can be up to 150 MB. The free plan has 10 GB of gallery storage, a paid plan 100 GB.
7. Studio (Mac app)
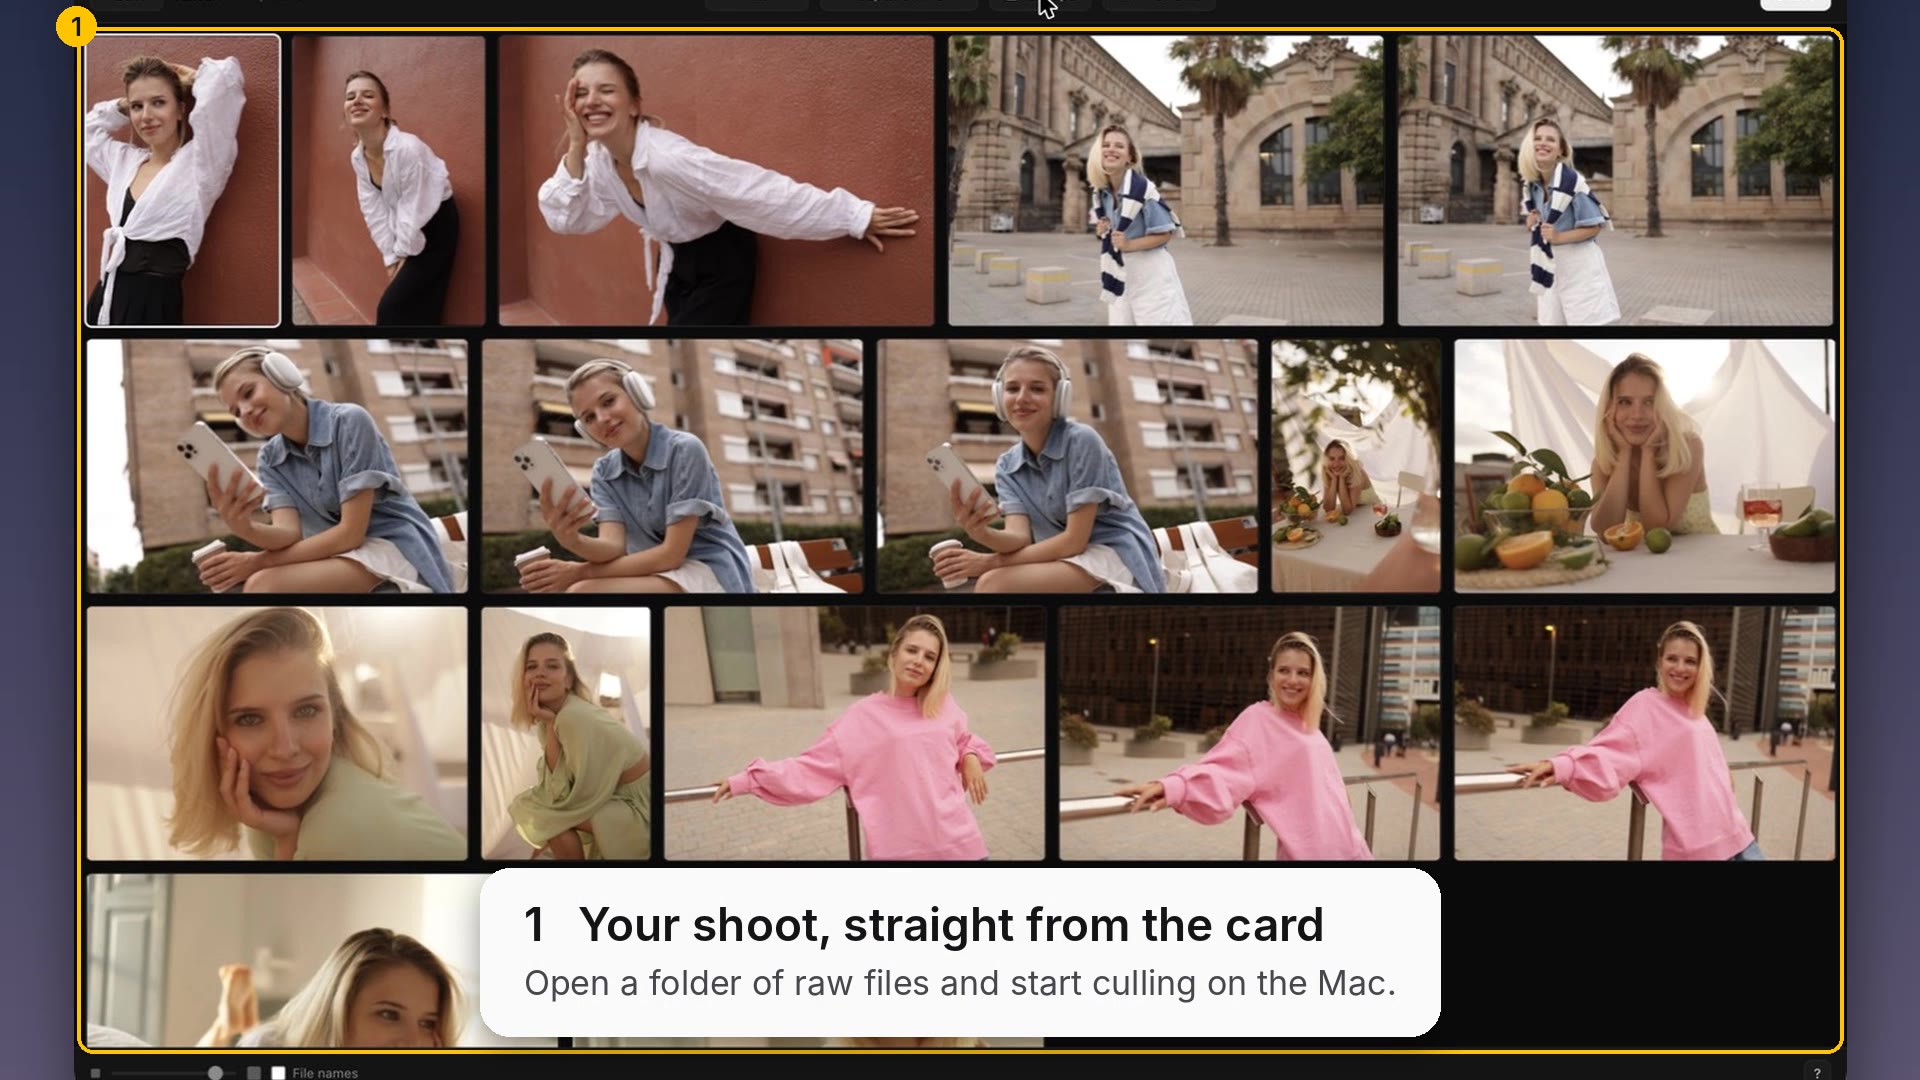
Studio is where you cull, edit and retouch your shoots, in the Mac app. It works with raw files.
Add a shoot: open the folder of photos from your card.
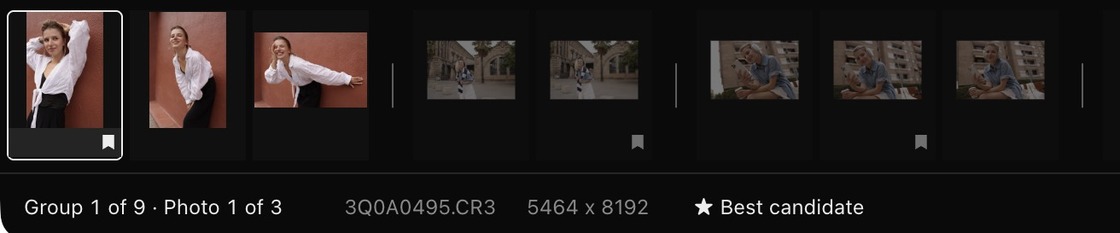
Click Groups. Studio stacks similar frames into groups. The number on a stack shows how many frames it holds.
Open a group and pick the best frame. Studio marks its suggestion as Best candidate. Keep it, or choose another.
Edit: light, color, presets and crop.
Retouch: skin, spots, dark circles, eye whites and teeth, face by face. Use the Heal brush for anything else.
Send to a client gallery: Studio creates a gallery from your edited picks (section 6).
You can also:
- Keep picking on your iPhone: shoots sync between Mac and phone.
- Edit in Lightroom: send your picks to Lightroom Classic or Lightroom in one step. What you export from Lightroom comes back into the same shoot.
8. Lio
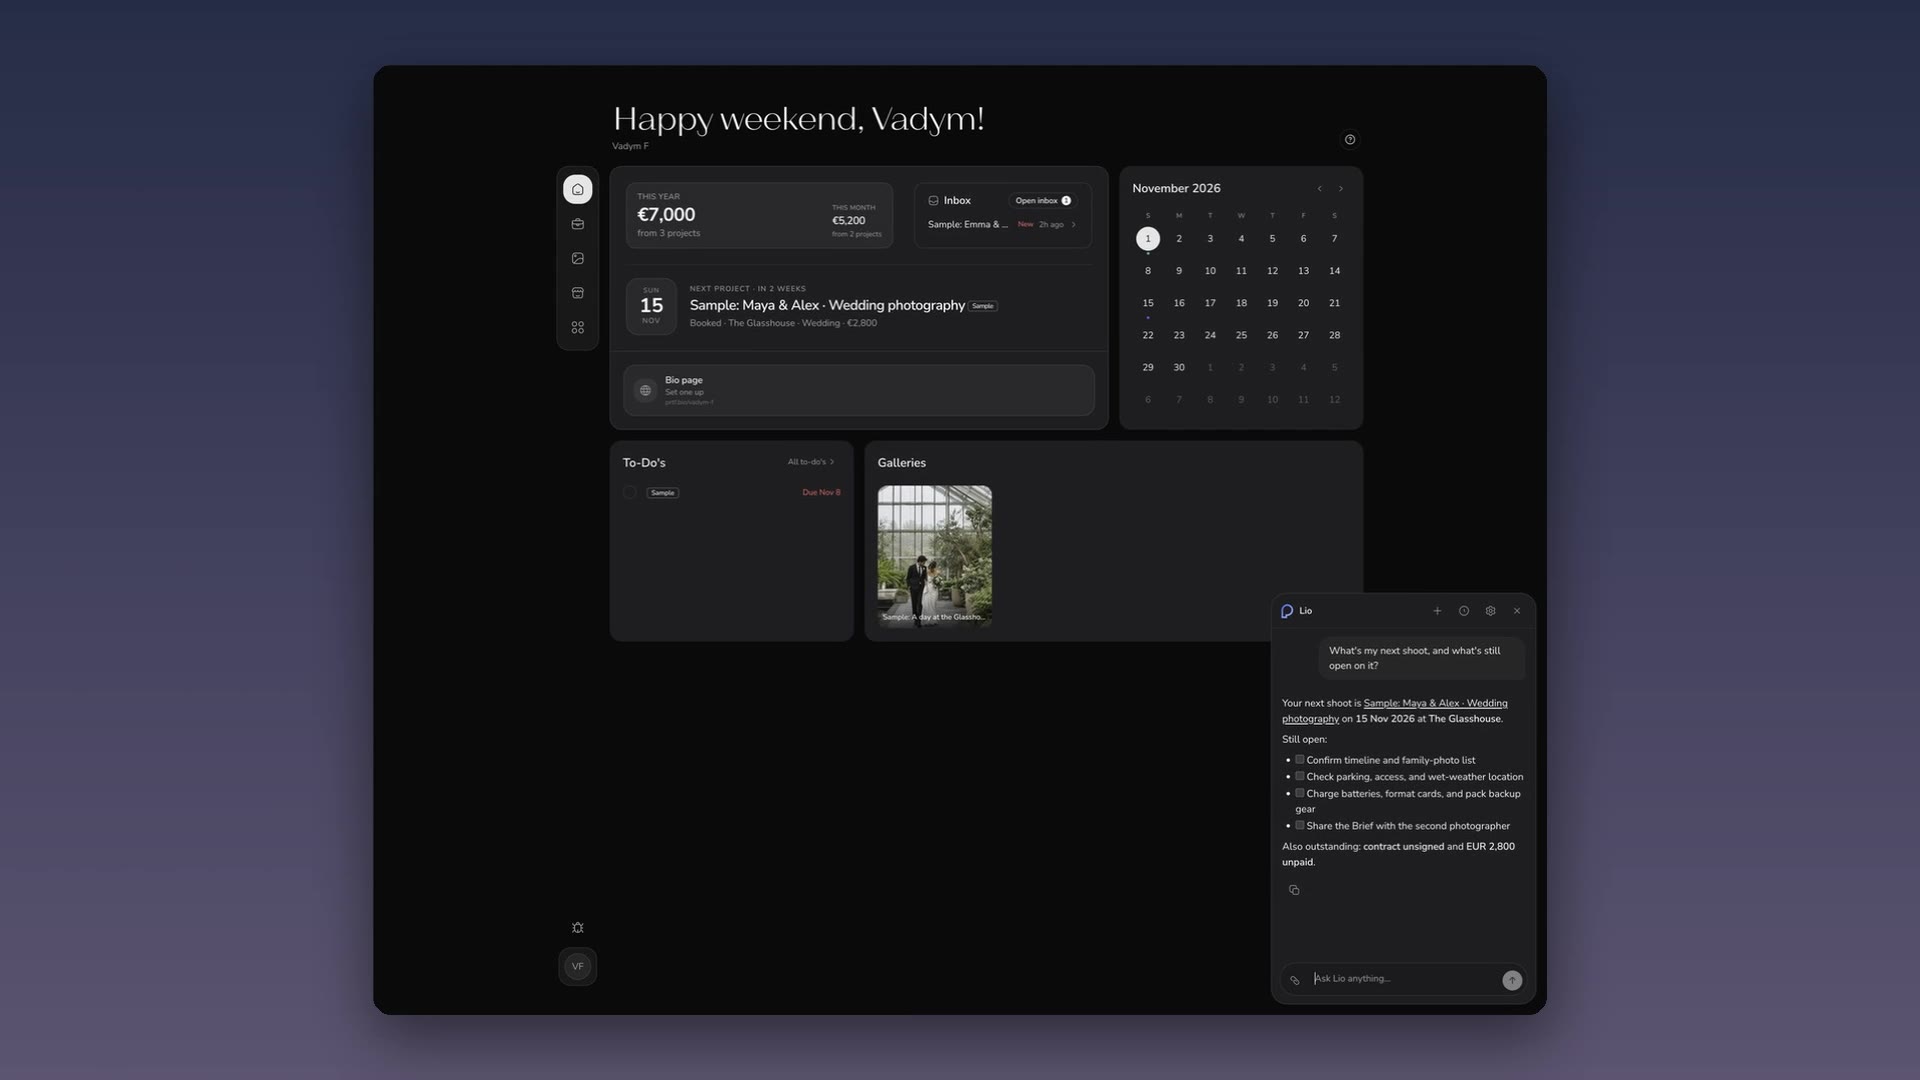
Lio is the assistant inside Portfelio. It can read your projects, emails and calendar, and it can create and change things in your account. Write to it in normal sentences in the web app, the iPhone app or Telegram.
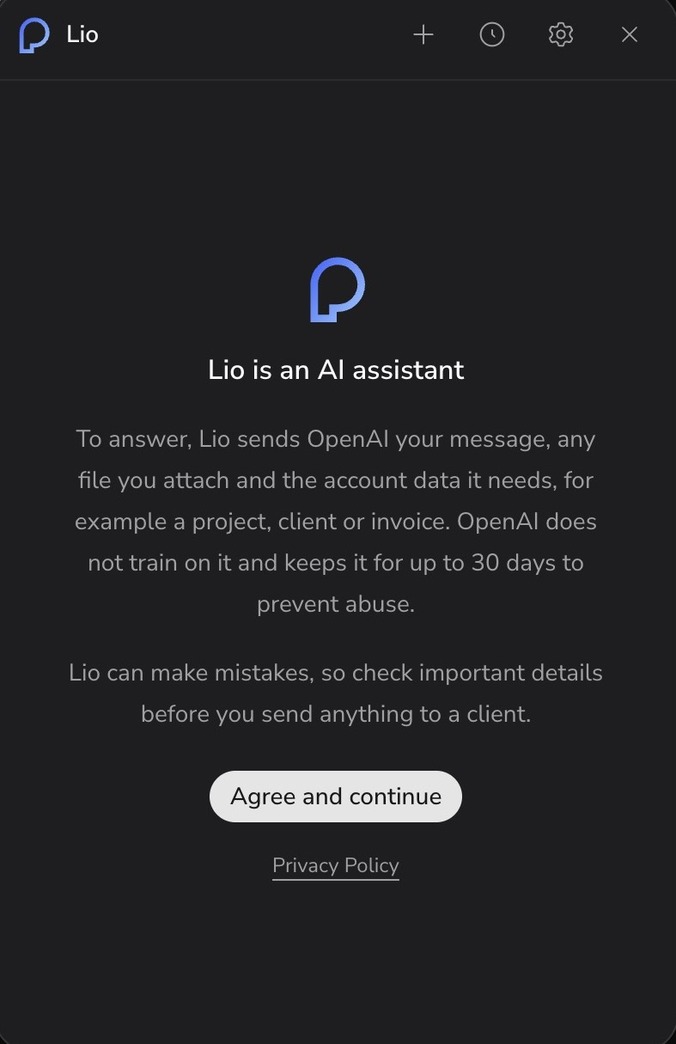
Click the round chat button at the bottom right of any screen. The first time, Lio explains which data it sends to OpenAI. Read it and click Agree and continue.
Try asking:
- “What’s my next shoot, and what’s still open on it?” Lio shows the shoot and flags an unsigned contract or unpaid invoice.
- “Create a project from this message” and paste the client’s message. Lio fills in the client, date and venue.
- “Make a contract and an invoice for this project.” Lio uses your templates.
- “Draft a reply to this client.” You edit it. Lio sends it only after you confirm.
- “Who is waiting for my reply?” Lio lists the inquiries and emails you have not answered.
- “Add this expense” with a photo of the receipt.
- “Add a call with Anna on Friday at 3.” Lio adds it to your calendar with a Google Meet link.
- “How much did I earn this month?” or “Which invoices are unpaid?”
- “What’s the weather at the venue on the shoot day?”
Lio remembers what you teach it about your business, like your prices or your usual timings. You can see and edit this in Settings → Lio.
Lio in Claude or ChatGPT: add Portfelio as a connector with the address mcp.portfelio.me/mcp and sign in with your Portfelio account.
More help
The Bio page editor guide. Guides for each part of Portfelio will be linked here as they are published.